Mastering the art of drawing a horse head is a rewarding challenge that beautifully combines observation, technique, and a passion for these majestic creatures. Whether you’re a seasoned artist or a beginner picking up a pencil for the first time, this step-by-step guide will equip you with the knowledge and confidence to capture the grace and spirit of a horse on paper.
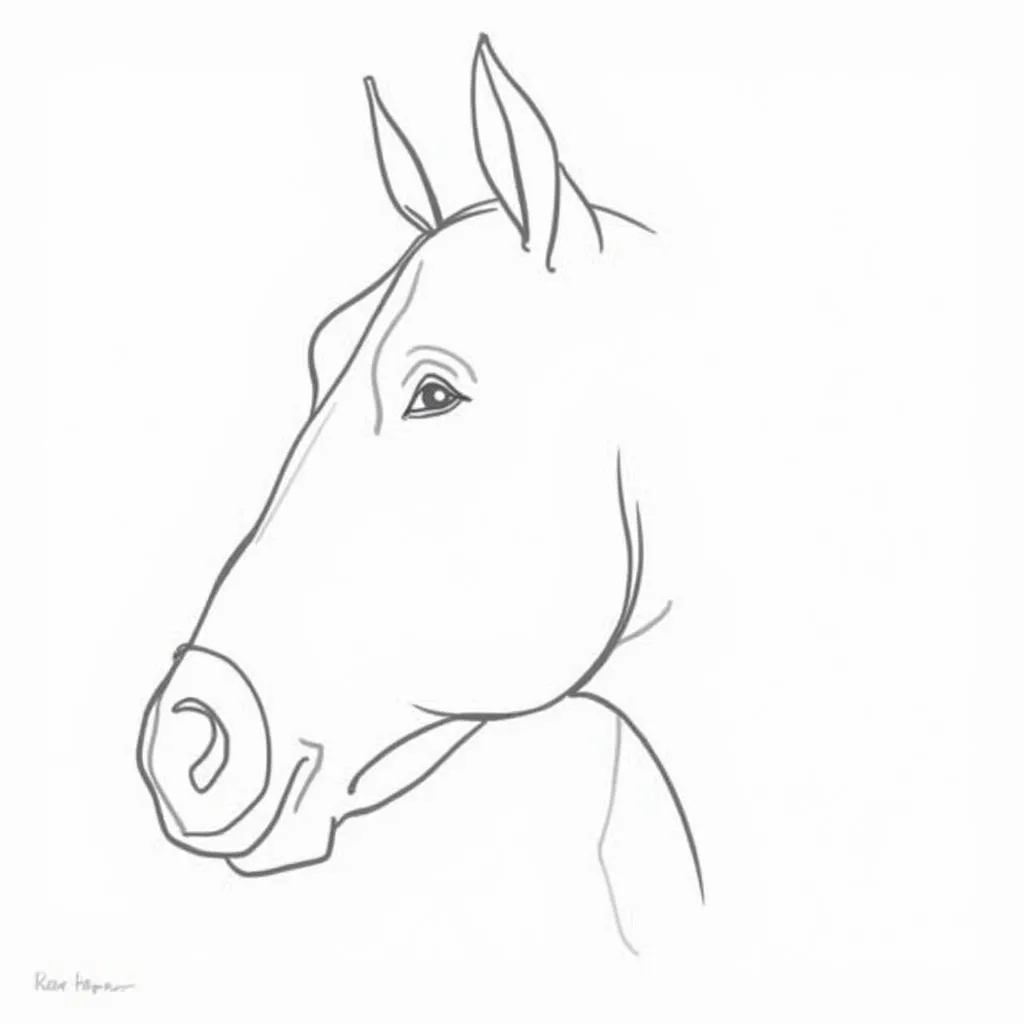 Horse Head Basic Shapes
Understanding Horse Head Anatomy for Artists
Before diving into the step-by-step process, it’s crucial to grasp the fundamental anatomy of a horse’s head. This understanding forms the foundation of your drawing, allowing you to accurately depict the proportions, angles, and musculature that give the horse head its unique character.
Key Anatomical Features to Consider:
- The Skull: Visualize the underlying structure of the skull – the large eye sockets, the powerful jawline, and the placement of the ears.
- The Muzzle: Observe the shape and size of the nostrils, the curvature of the lips, and the position of the chin.
- The Eyes: Pay close attention to the shape, placement, and expression of the eyes. They are key to conveying emotion and life in your drawing.
- The Ears: Notice the shape, direction, and mobility of the ears. They play a vital role in expressing a horse’s alertness and mood.
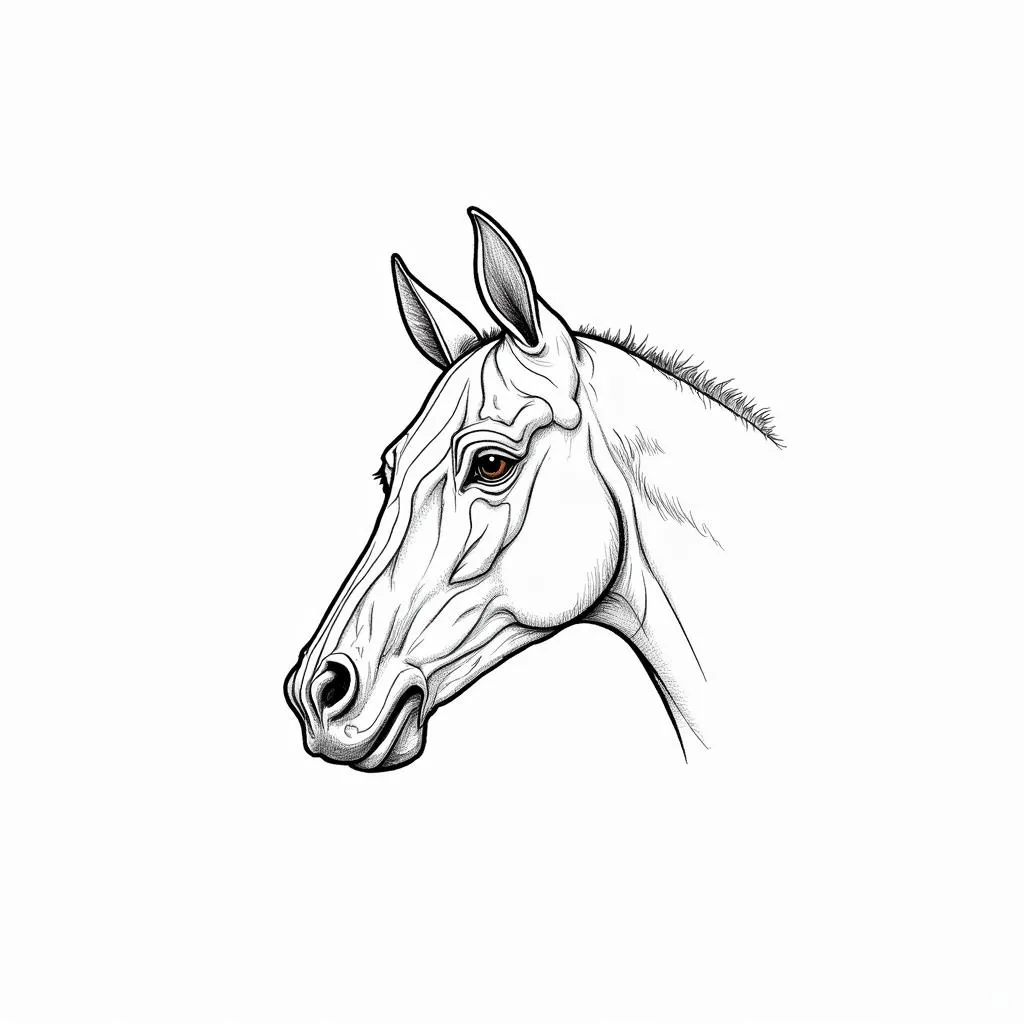 Horse Head Anatomy Diagram
Materials You’ll Need
Gather the following art supplies to embark on your horse head drawing journey:
- Drawing Paper: Choose a smooth, acid-free paper for best results.
- Pencils: Have a range of pencils on hand, from HB for sketching to 2B or 4B for darker lines and shading.
- Eraser: A kneaded eraser is ideal for lifting graphite and making adjustments.
- Blending Stump: This tool is useful for softening lines and creating smooth transitions in shading.
Step-by-Step Guide: Drawing a Horse Head
Now, let’s break down the drawing process into manageable steps:
-
Start with Basic Shapes: Begin by lightly sketching the basic shapes that form the horse’s head. Use a circle for the cheek, a smaller circle for the muzzle, and a square-like shape for the cranium. Connect these shapes with curved lines to outline the jaw and neck.
-
Refine the Outline: Over the initial shapes, refine the outline of the head, paying attention to the curvature of the jawline, the placement of the eye sockets, and the position of the ears.
-
Add Facial Features: Draw the eyes as almond shapes, slightly tilted downwards. Add the nostrils as comma-like shapes on the muzzle. Sketch the mouth with a gentle curve.
-
Ears and Mane: Draw the ears as pointed ovals, ensuring they are proportionally spaced and positioned on the top of the head. Lightly sketch the mane, flowing backward from the forehead.
-
Shading and Details: Now comes the stage where your drawing comes to life. Use shading to create depth and dimension. Start by identifying the light source. Areas closest to the light source will be lightest, while areas further away will be darker. Use a blending stump to soften the transitions between shades.
-
Refine and Finalize: Take a step back from your drawing and look at it with a critical eye. Make any necessary adjustments to proportions, shading, or details. Once you’re satisfied, you can darken your final lines and add any finishing touches.
Tips for Capturing Equine Expression
- Eyes are Key: The eyes are the windows to the soul, and this holds true for horses as well. Pay close attention to the shape, size, and direction of the eyes to convey different emotions.
- Ear Play: The position of a horse’s ears speaks volumes about its mood. Ears pricked forward indicate alertness, while ears flattened back against the head convey anger or fear.
- Nostril Nuances: Even subtle changes in the shape of the nostrils can indicate a horse’s state of mind. Flared nostrils often suggest excitement or exertion.
Conclusion
Drawing a horse head is a journey of observation, technique, and artistic interpretation. By following these step-by-step instructions and practicing regularly, you’ll develop your skills and learn to capture the beauty, power, and grace of these magnificent animals on paper. Remember, the key is to be patient with yourself, enjoy the process, and never stop observing the world around you with an artist’s eye.
Need further assistance with your equine artistry? Contact us at Phone Number: 0772127271, Email: [email protected] Or visit our address: QGM2+WX2, Vị Trung, Vị Thuỷ, Hậu Giang, Việt Nam. We have a 24/7 customer service team.