Creating Diy Horse Ornaments is a fun and rewarding way to celebrate the holidays and showcase your love for horses. Whether you’re a seasoned equestrian or just starting your journey in the world of horses, crafting these unique ornaments will bring a touch of equestrian charm to your home decor.
This article will guide you through a step-by-step process to create beautiful and personalized horse ornaments that you can proudly display on your Christmas tree, mantel, or anywhere else in your home. We’ll also explore different materials and techniques, from simple and classic to creative and intricate designs, ensuring you have plenty of inspiration to unleash your creativity.
Choosing the Right Materials
The first step in crafting your horse ornaments is selecting the appropriate materials. Here are some popular options:
- Polymer Clay: A versatile material that allows for detailed sculpting and comes in a wide range of colors. You can bake it in an oven to harden it, making it durable enough for ornaments.
- Salt Dough: A simple and natural alternative to polymer clay, salt dough is easy to work with and can be baked in the oven to harden. It’s a great option for families with young children who want to participate in the craft project.
- Wood: Natural wood can be carved or shaped into horse silhouettes, providing a rustic and elegant look. You can paint or decorate the wood to personalize your ornaments.
- Felt: Soft and easy to cut, felt is an ideal material for creating simple and whimsical horse ornaments. It can be sewn, glued, or even felted together using a needle and wool roving.
- Recycled Materials: Unleash your creativity and use recycled materials like cardboard, bottle caps, or buttons to create unique and eco-friendly ornaments.
Step-by-Step Guide: Creating a Polymer Clay Horse Ornament
Materials:
- Polymer clay in your desired color (brown, black, white, or a mixture)
- Craft knife or sculpting tools
- Rolling pin
- Oven-safe surface
- Acrylic paint (optional)
- Paintbrush (optional)
- Ribbon or twine for hanging
Instructions:
- Prepare the clay: Knead the polymer clay until it is soft and pliable. Use a rolling pin to roll out the clay into a thin sheet.
- Create the horse shape: Use a craft knife or sculpting tools to cut out a horse shape from the clay. You can find free horse templates online or draw your own.
- Add details: Once the horse shape is cut, add details like eyes, mane, tail, and hooves using more polymer clay.
- Bake the ornament: Follow the instructions on your polymer clay packaging for baking time and temperature. Make sure to bake the ornament on an oven-safe surface.
- Finishing touches: Once the ornament is cooled, you can add a coat of acrylic paint or leave it in its natural color. Attach a ribbon or twine for hanging.
Creative Design Ideas for Horse Ornaments
- Traditional Horse Silhouette: A simple and classic design that is easy to create and always looks elegant.
- Standing Horse: Add more detail by creating a horse standing in a natural pose with its legs slightly spread out.
- Jumping Horse: Capture the grace and power of a horse jumping over a hurdle. You can even add a miniature fence to your ornament.
- Horse with Rider: Create a mini equestrian scene by sculpting a horse with a small rider on its back.
- Breeds Specific Ornaments: Sculpt different horse breeds like Quarter Horses, Arabians, or Thoroughbreds, adding unique features like specific markings or coat patterns.
- Personalized Ornament: Add a special touch by adding a nameplate with your horse’s name, a date, or a special message.
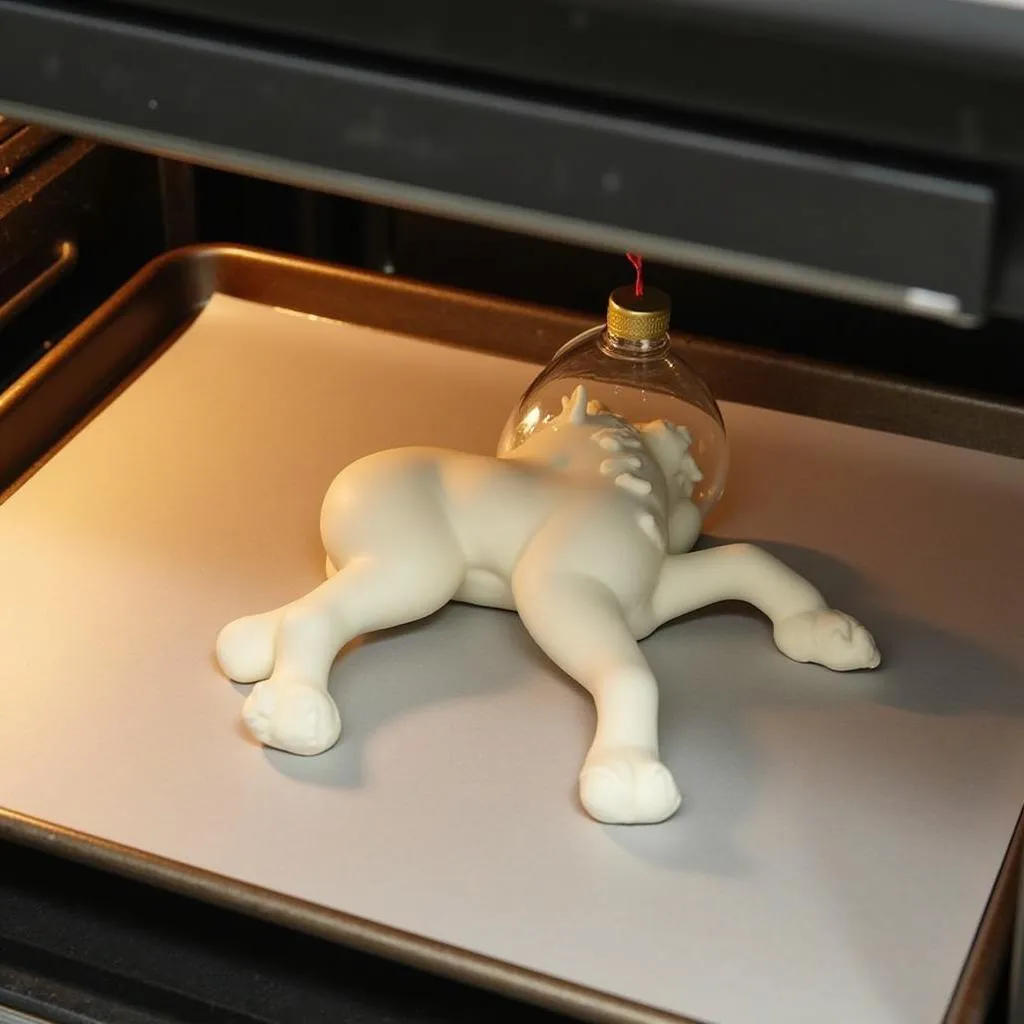 Baking a polymer clay horse ornament in an oven
Expert Tips for DIY Horse Ornaments
Here are some tips from our equine expert, [Name of expert], a renowned equine artist with over 20 years of experience:
“Use your fingers to smooth out the clay and create realistic curves and folds. It’s about getting that natural feel. Don’t be afraid to experiment with different colors and textures.”
“When adding details, keep them small and precise. You want to capture the essence of the horse without overwhelming the ornament with too much detail.”
“Don’t be afraid to embrace imperfections. Those little quirks can add character and personality to your ornaments.”
FAQ (Frequently Asked Questions):
-
Q: What kind of paint is best for polymer clay ornaments?
- A: Acrylic paint is the best choice for polymer clay ornaments. It dries quickly, provides a smooth finish, and comes in a wide range of colors.
-
Q: Can I use air-dry clay for horse ornaments?
- A: Yes, air-dry clay is a good alternative to polymer clay, especially if you don’t have an oven. However, air-dry clay may not be as durable as baked polymer clay.
-
Q: Can I use other materials besides polymer clay for my horse ornaments?
- A: Absolutely! Explore other materials like wood, felt, cardboard, or even recycled items to create unique and personalized ornaments.
Conclusion:
Creating DIY horse ornaments is a delightful and rewarding craft project that lets you express your love for horses while adding a special touch to your holiday decor. With a little creativity and these simple tips, you can create beautiful and personalized ornaments that you’ll cherish for years to come.
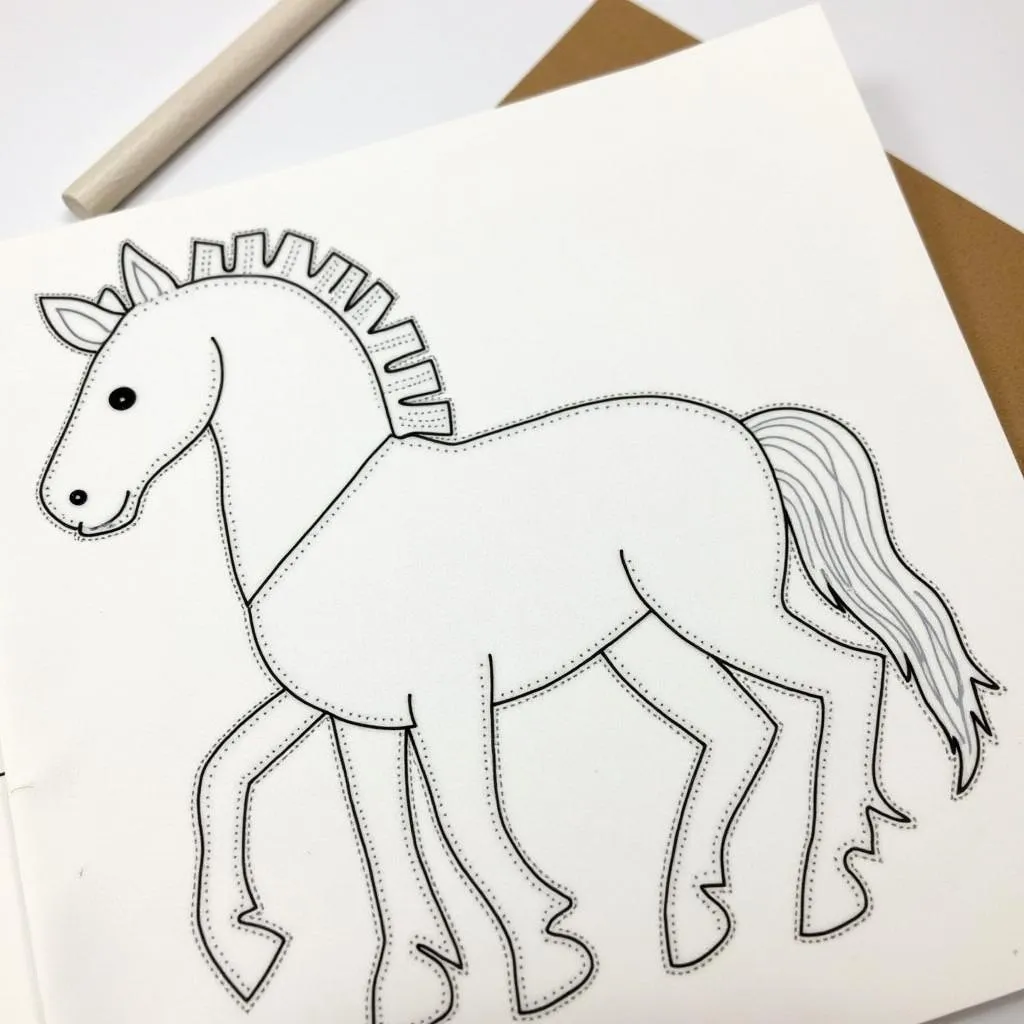 Creating a felt horse ornament using a pattern
If you need additional assistance or have any further questions about DIY horse ornaments, please don’t hesitate to contact us. Our team of experts is here to help you create something truly special.
When you need help, please reach out to:
- Phone: 0772127271
- Email: [email protected]
- Address: QGM2+WX2, Vị Trung, Vị Thuỷ, Hậu Giang, Việt Nam.
We have a 24/7 customer support team ready to assist you!